

Imagine the next time you get Starbucks: you pull out your iPhone, the cashier scans it, and you're done! Now how tech savvy would you look then? Pretty cool. We want all our Simple iPhone readers to learn this so they can impress their friends. We'll run through the steps to do this right here.
First off, you need to have an account with Starbucks and a Starbucks Card. You can use any Starbucks gift card to get started and if you don't have a gift card just grab one next time you're around one. Once you have a card, go register it and create an account on the Starbucks website. You can also create an account inside the iPhone app (discussed further down).
There is a way to use your iPhone to pay for Starbucks without making an account but we incourage you to make one so you can enjoy the benefits of their rewards program.

If you don't have an account or a card yet, you'll need to do that first. Sorry, it's the way it is. Now for those who already have an account, let's go on to step 2!
Next, we need to download the free Starbucks app. You can do this by clicking the image below.

After installing this free app, go ahead and open it.
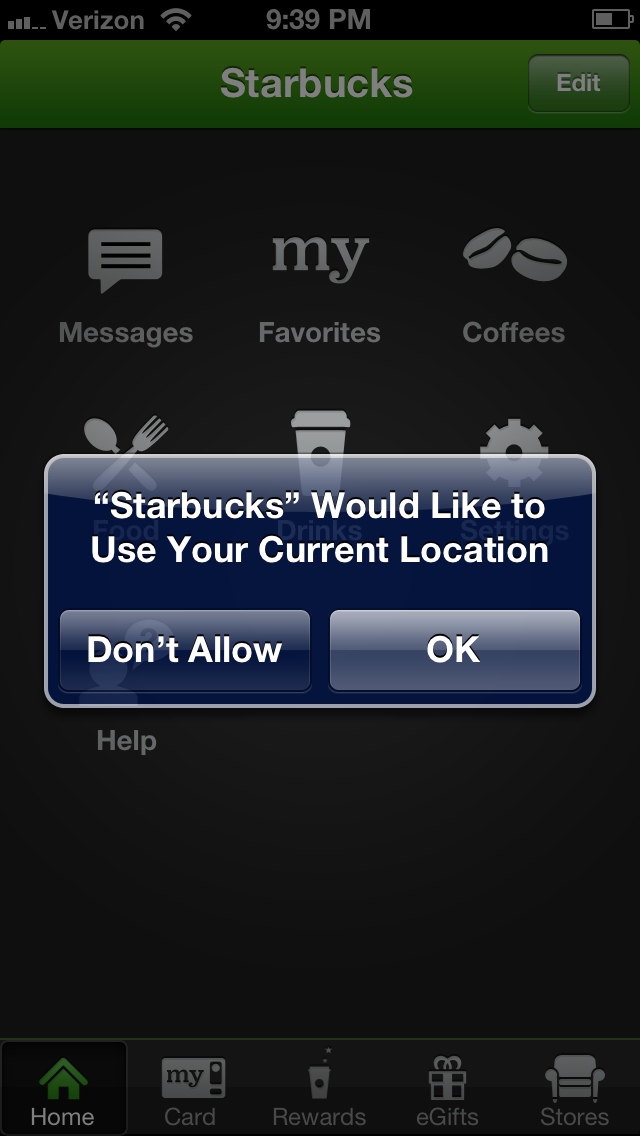
It will ask you to use your location because a feature within the app find Starbucks locations around you. If this sounds helpful to you, hit OK.
You'll notice when you click on Card or Rewards that it will ask you to Sign Up, Sign In, or Continue Without Account.

If you haven't created an account yet, you can do so now inside the app. If you already have an account, go ahead and sign in with the credentials you created while on their website.
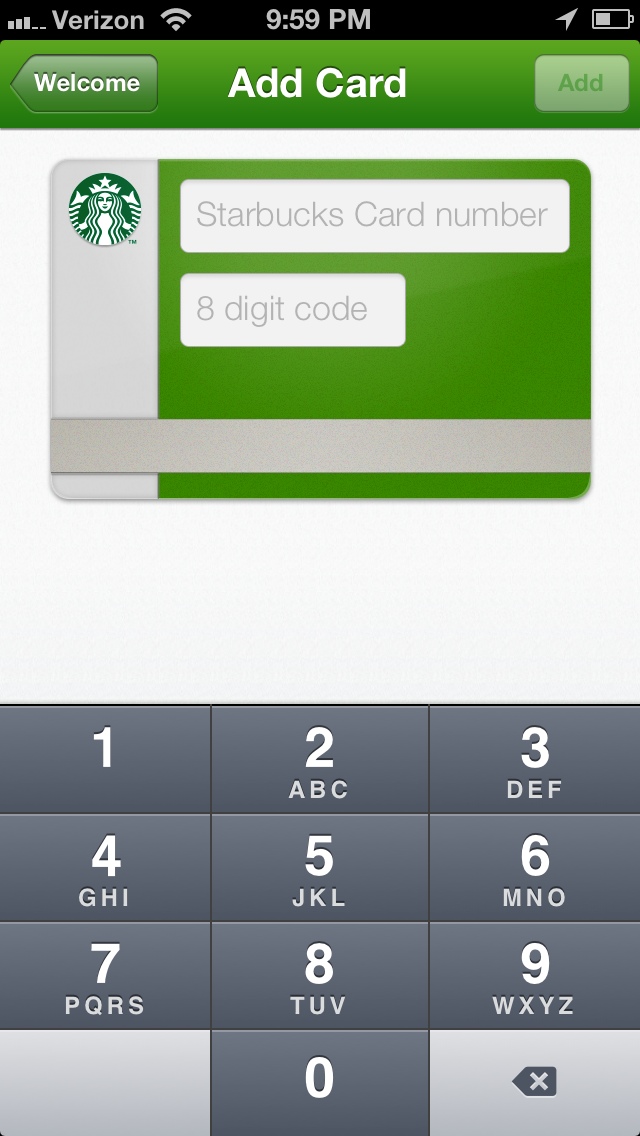
If you continue without an account, you'll go straight to a screen prompting for your Starbucks gift card information.
Either way, if you signed up and registered a card, signed in with a card already previously registered, or simply registered a card without an account, you'll be ready for the next step.
If you go to Card, you may now see something like this:
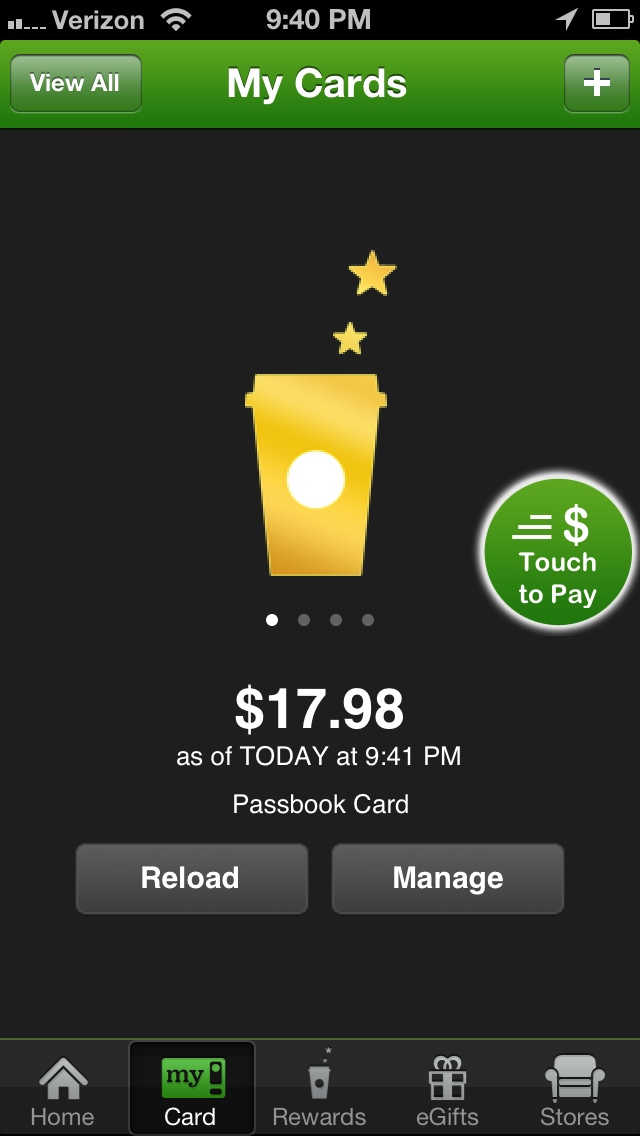
This is the place where you can see your current balance and have the ability to manage your card(s).
Hitting Reload will allow you to put additional funds onto the selected card. I've done this one time while in line because my balance was too low. Luckily my internet connection was fast enough for me to quickly add funds and be ready by the time it was my turn to order.
Hitting Manage will bring up some options.
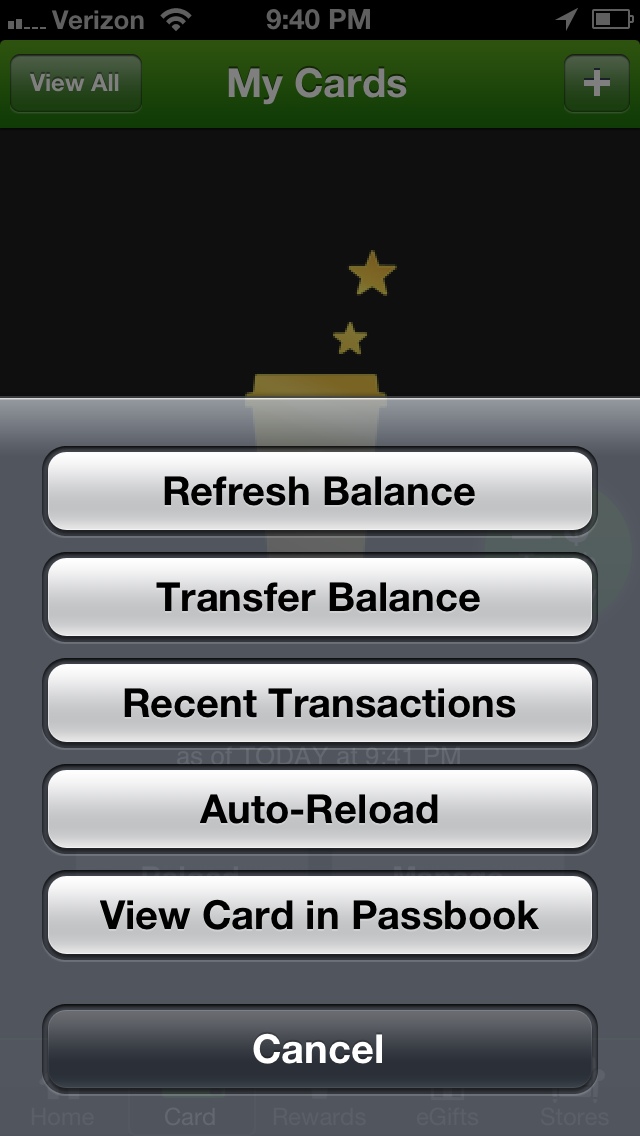
Here you can do a few actions and they're all pretty much self-explanatory. We will focus on View Card in Passbook because that's our ultimate goal, right? 🙂 So go ahead and click that.
This will open up your Passbook app on your iPhone. For most people, this will be the first item in your Passbook's contents.
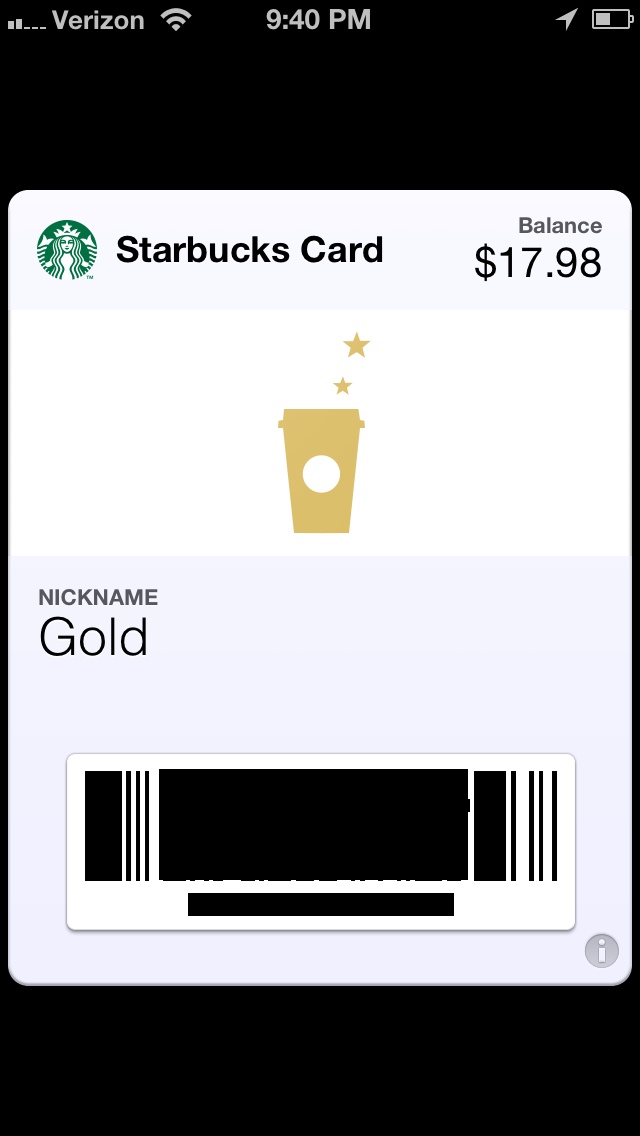
This is your digital representation of your actual physical Starbucks gift card. When you are in line at Starbucks, opening up your Passbook app and allowing the cashier to scan this will be sufficient to pay for your drink. How cool is that?
It takes about 2 seconds to complete the transaction and you'll be on your way to feeling extremely tech savvy. A modest grin on your face is expected as you walk to the standby area to wait for your drink.


Comments