
") The new iOS operating system (iOS 6) brought with it a slew of new features. One feature that really stands out is the ability to take panoramic pictures with the Camera app. This feature makes it easy to quickly capture a whole scene in one seamless picture. There is an important limitation to note from the outset: only certain iPhones will be able to take advantage of this feature. Only the following iPhones will be able to use the panorama feature: iPhone 4S, iPhone 5, and whatever newer iPhone Apple comes out with after this article is published. This tutorial will teach you how to use the panoramic feature on your iPhone to take amazing wide, panoramic photos! Let’s get started.
The new iOS operating system (iOS 6) brought with it a slew of new features. One feature that really stands out is the ability to take panoramic pictures with the Camera app. This feature makes it easy to quickly capture a whole scene in one seamless picture. There is an important limitation to note from the outset: only certain iPhones will be able to take advantage of this feature. Only the following iPhones will be able to use the panorama feature: iPhone 4S, iPhone 5, and whatever newer iPhone Apple comes out with after this article is published. This tutorial will teach you how to use the panoramic feature on your iPhone to take amazing wide, panoramic photos! Let’s get started.
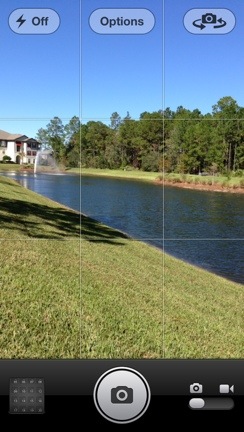
First, open the “Camera” app. Although other camera apps may also have a panoramic feature, the camera app we are using here is Apple’s camera app that comes pre-installed on every iPhone.

At the top of the screen, in the middle, tap on the “Options” button.

As you can see, a menu slides down, revealing some of the Camera app’s features.
Tapping the “Grid” toggle will turn on or off a grid overlay that appears on your iPhone screen when taking pictures. (Don’t worry, the grid won’t appear on the photo after you take it.) This makes it easier to line up the subject of your photo in just the right spot.
Tapping the “HDR” toggle will turn on or off HDR mode. “HDR” is short for High Dynamic Range imaging and, when in use on the iPhone, allows your iPhone to take multiple pictures at varying exposures and then combine those multiple pictures into a single image with a greater dynamic range. Essentially, this means that the details of the picture will really pop out because the details in the shadows and highlights of the picture will be enhanced.
Below these two toggles, you will see the “Panorama” button. When you tap this button the screen returns to picture-taking mode, but with a new overlay.
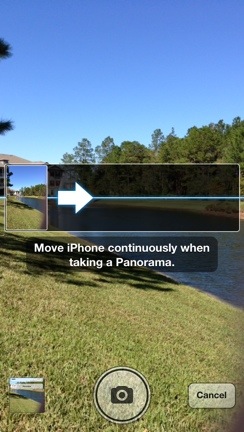
At this point, you should point the iPhone to the left-most side of the scene you want to capture. We are going to capture the scene from the left-side moving to the right-side.
Next, while standing in place, slowly move the iPhone to the right until the the dark area in the middle of your iPhone is filled with your picture. While doing this, you want to keep the point of the arrow as close as you can to the light blue line in the center of the screen. If you move too fast, your iPhone will display a message asking you to slow down.


When you have captured all that you wanted to capture, hit the blue “DONE” button on the bottom of the screen. If you do this, your iPhone will automatically save the panoramic image to your camera roll. Alternatively, you can move the iPhone to the right until the white rectangle reaches the far right side of your iPhone screen. Once the white rectangle reaches the far right side of the screen, your iPhone will automatically save the panoramic image to your camera roll. That’s really all there is to it. Here is our panoramic picture (click on the picture to see it in its full size).

There are a few final things to note though. First, you can only use panoramic mode while in portrait mode (while you iPhone is vertical). Second, if you want to take the picture by moving the iPhone from right to left (rather than from left to right), simply tap on the center of the screen anywhere inside the big, horizontal white rectangle (see picture below). Finally, you cannot use flash while take a panoramic picture.

Now that you know how to use the panoramic picture feature on your iPhone’s camera, go out and take some panoramic pictures. We would also love to see some of the pictures you take, so be sure to share some links to them in the comments section!


Comments