

You’ve seen the commercials for other smartphones where they bump phones to share files, right? Well, Apple’s version of this doesn’t require you to “bump” anything. It’s called AirDrop and I’ll show you how to use it.
Sharing files with someone is always possible with email, but AirDrop makes it even easier with email out of the picture. If you’re next to the person (or people) you want to share with, you can utilize AirDrop to securely share your document or photo.
AirDrop uses the Wi-Fi network you and your friend are both on, or via Bluetooth. Automatically. No setup required. It can be used to share to one person or to a group of people around you very quickly. This can work amongst most iOS devices such as iPhones, iPads, and even iPods.
First off, let’s make our devices available to receive AirDrop files. While viewing your home screen, swipe up from the bottom of your screen to view the Control Center.
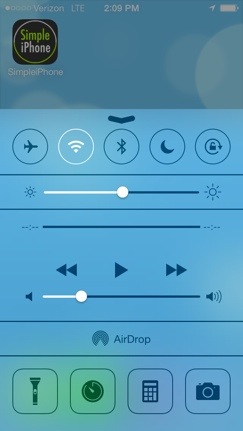
See AirDrop? Let’s touch that.
Now you must choose who you are willing to receive AirDrop requests from. You can either choose “Everyone” who has an iOS device, people who are in your contacts list (with iOS devices), or no one at all. For this example, I’ll choose “Everyone”.
 There we go. Now AirDrop is enabled. You’ll see that this is enabled in your Control Center.
 Now let’s try sharing a photo with a friend using AirDrop. Make sure your friend also has AirDrop enabled!
Let’s go to Photos.

Now navigate to the photo you wish to share.
 This looks like a good example. Now let’s bring up the “Share Sheet” by pushing the icon on the bottom-left of your screen.
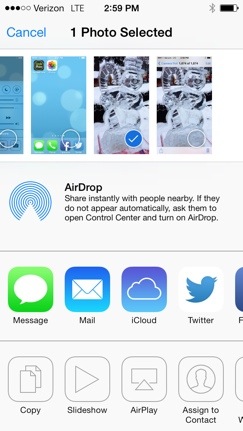 Here, you’ll see all the options that you can do with this photo. What we want to do is use AirDrop! See the area in the middle of your screen that says AirDrop? Be patient. Once your device finds someone around you that has AirDrop enabled, they will appear in that area. If they never appear, make sure they have it enabled in their Control Center. Once it’s ready, it’ll look something like this:
 My device found “Inga” near me. Now all I have to do to share the photo with her is touch her picture.
 Next you’ll see “Waiting…” underneath her name. During this time, a prompt will pop up on her device asking whether to accept the request to share that photo. Her screen will look something like this:
 She can either accept or decline. Hopefully she accepts! Once she accepts, it’s done. The photo will be added to her photo album. My screen will then look something like this:
 You can see that it now says “Sent” underneath her picture instead of “Waiting…”. This means it’s all done. She has received the picture.
This same thing can be done with documents! While viewing the document, look for the Share button to bring up the Share Sheet just like in this example. You’ll see the AirDrop area just like this from that point on.
It should also be noted that you can send and recieve files from Apple computers too! AirDrop is possible with all new Apple computers. If you have one, give it a shot sometime.
Don’t forget, you can also send to more than just one person. Just tap all the people that show up in the AirDrop area that you wish to share the file with. Pretty awesome, right?


once i have sent a photo via air drop to a friend can i delete it from my iphone and will it stay on theirs?
Yes.